Showing posts with label diy. Show all posts

DIY RECYCLED COFFEE CANDLES

Thursday, 7 December 2017
The idea of doing any sort of DIY with a clingy appendage in the form of a 3-month-old baby in tow is highly amusing, but I really felt like using my brain for something other than remembering what time I last fed the baby today, so here is a blog post with a back story.

I'm not some impressive mum launching into a new kitchen table venture a mere 9 weeks after giving birth...these candles were in fact made this time last year for a client who didn't end up using them. Which is fine by me because it means I have something shiny and new to post on my blog.

Made with layers of used up coffee grounds, these candles make beautiful, thoughtful gifts and they were actually a lot easier than I expected, with all of the 'ingredients' recycled from around the house. Cheaper than buying wax granules to melt, I scavenged leftover wax from around the house; wax left in other candle jars, partially used tea lights from one too many IKEA hauls and a handful of tapered candles I've never used because I don't have candlesticks. The used coffee grounds give a slight aroma when you burn the candles and the jars were a mismatch - my favourite to use are the little ones leftover from Glenilen Farm yoghurts (available at Waitrose).

1. Collect leftover wax in a heatproof glass jug and place the jug in a small saucepan of water. Bring the water to the boil and the wax will melt to liquid in a few minutes. For any wax left in glass jars, place in a jug of boiled water for a few minutes and the wax should pop out of the bottom.

2. Meanwhile, place a wick (available from craft shops/eBay) in an empty glass jar - buy readymade wicks with a weighted metal tip, which can be glued into the bottom of the jar. My wicks actually came from the tapered candle; I bashed up the candles and the wick pulled out fairly easily.

3. Wrap the long end of the wick around a pencil placed across the top of the jar and carefully pour in a layer of melted wax.

4. To create a layered effect, refrigerate for five to 10 minutes to harden, then add a teaspoon of coffee grounds.

5. Pour over another layer of melted wax and repeat until you have filled the jar. If the wax in your jug sets, you can repeat the boiling process to re-melt as many times as you need.

6. Once fully hardened, trim the wick to your desired length.


WEDDING DECORATIONS + DIYS

Friday, 28 October 2016
When you scour wedding blogs and Pinterest for ideas, everything starts to look the same. The more I looked, the more I simultaneously wanted to do all of the things and none of the things. In the end, I think we found a good middle ground. The pub was pretty enough that it really didn't need much in the way of decorations, just flowers and a bit of bunting. I was very chilled in the run-up to the wedding and then two weeks before I realised that I did want all of the things, and so began a round of frantic shopping, online ordering and quick DIYing.

MISMATCHED CHRISTMAS GIFT WRAPPING

Friday, 18 December 2015

Of course it's what's inside that counts, but I always like to make a special effort with the wrapping paper too. I usually go down the brown paper route - especially when there's a stash of beautiful velvet ribbons at hand (Tiger is the best. You can't go wrong with £1 a roll!)

This year, I picked out a few rolls of coloured wrapping paper as well - again, from Tiger. Although there are three different types of paper, the gold brings everything together and I think that harlequin turquoise makes for such a great contrast. Hooray for non-Christmas Christmassy colours!


These hand-painted gift tags were just about all the crafting I could muster this year. It was actually really relaxing to get my paper and paints out and spend an evening designing different baubles and despite the minimal effort, I actually think they turned out rather sweet! At the last minute, I also did a few red toadstools inspired by my favourite vintage decorations - they go perfectly with the acorn paper!


Luckily I have a small family so Christmas wrapping doesn't take too long. I like to make an evening of it - I had a glass of mulled wine and Graham Norton on in the background while I wrapped up my presents. This might be a dorky thing to suggest, but wouldn't it be fun to have a wrapping party! You could pool resources with friends, put on some Christmas music and get wrapping. Or, the easiest alternative, just go somewhere where they do it for you - last year I blogged about Kiehl's who offer hands down the best gift wrapping service.


CHRISTMAS CRAFTING

Monday, 14 December 2015

I was on such a crafting kick this time last year, but this year I'm not so into it. I've done quite a lot of my Christmas shopping (don't hate me!), but I still love to include a few handmade items, so I thought I would do a little round-up of some craft ideas you might have missed if you haven't been reading my blog for very long - sorry about the repeat for anyone who's stuck around a while ;)


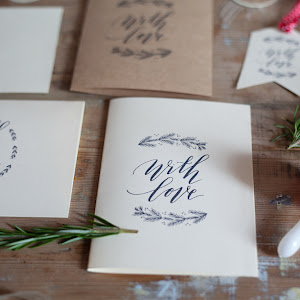
Last year I went on one of Quill London's calligraphy workshops with Imogen Owen and they kindly offered to create a free printable for 91 Magazine. This was one of my favourite features I put together for 91 Magazine because I loved the calligraphy class but it turns out I wasn't quite as talented as I thought I was going to be. Siobhan shot the lovely image above for the feature, which has templates to create a card and a gift tag.

I also got crafty with the printable myself, using the calligraphy motif to create little gift 'medals' and transform everyday paper bags into something a little bit more personal; the super-easy tutorial can be found here.


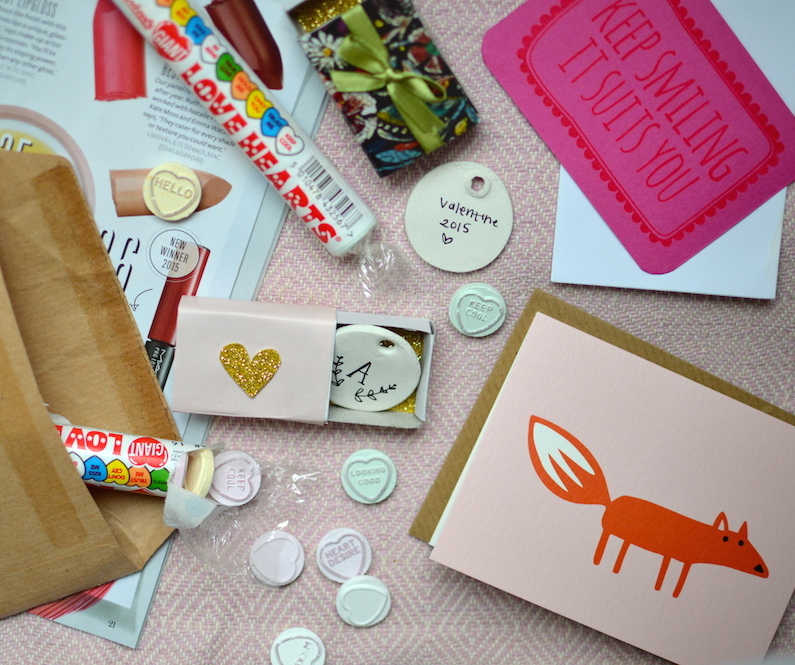
I actually created these little gift boxes for Valentine's day - and still have them piled up beside my bed because I couldn't bear to give them away! - and they would be perfect for gifting tiny treasures this Christmas too. Little children would love them (they could be gifts from Father Christmas' elves!) and they're perfect to wrapping up stocking fillers or little jewellery gifts.


And last but not least, clay ornaments. These are the easiest (not to mention cheapest!) DIY ever and result in a really thoughtful gift. I sent out plain brown paper Christmas cards with tiny personalised ornaments last year and they went down a treat. This year, I'm using the same tutorial to make larger discs as candle covers to stop my favourite candles getting dusty. On a side note, this DIY also informed my Christmas present from my parents; a new lens for my camera. Up until then, I had been using the kit lens it came with, but I borrowed my friend's lens to take these photos and knew I had to have one! It made a marked difference to my photos and has allowed me to take all of the food photos I'm not so proud of!

A SPECIAL VALENTINE FOR MY GIRLFRIENDS

Monday, 9 February 2015

How do you celebrate Valentine's Day? A romantic dinner? Date night on the sofa with Ben and Jerry? My boyfriend and I tend to just exchange cards and a kiss as our anniversary is a few days later, but I know some people go all out!

When I lived in America as a child, Valentine's Day was huuuge! Some say it's just a hugely commercialised holiday, but it was really fun to celebrate. Everyone makes/sends Valentine's not just for their partners, but for friends, children and so on. It's a really big deal at school, and we used to spend a few hours making our own shoebox letterboxes and on the day itself everyone would bring in cards to pop into each others' boxes. It wasn't just for the boy you had a crush on, it was an inclusive day where everyone got to feel a little bit special!

With that in mind, this year I put together 'Galentines' Day packages for a couple of my friends who I never got around to sending Christmas cards to (whoops). Nothing fancy, just a sweet card, a packet of Love Hearts and one of the little clay ornaments I made at Christmas inside a little matchbox gift box.

Will you be doing anything special? I think we're just going to get a takeaway and stay in our pjs all day. 
Who said romance is dead!

VALENTINE'S DAY DIY: mini gift boxes

Wednesday, 28 January 2015

I love a good Valentine's craft and this one is particularly adorable, so excuse the amount of photos - I just couldn't pick my favourites! This little DIY was destined as a guest post for Polly's blog, A Rowan Tree, while she's travelling the world, but I just couldn't get it done over there. I'm sharing some of my favourite Valentine's DIYs over on her blog though, so pop over there if you want to make something a big bigger for that special someone (and some guy-friendly ideas as well)!


These tiny gift boxes are made from little matchboxes I got from eBay. I collected a bunch of crafting scraps and sat down with a cup of tea for a few hours to make these. I got a bit obsessed and before I knew it the whole afternoon had passed! I used magazine pages, wrapping paper leftovers and some old greetings cards - the Anthropologie catalogue turned out a few beauties too! I just used double sided sticky tape to secure the paper and made sure to cut out little rectangles as lining too.


They really are tiny, so they would make a perfect box for little rings, sweets and love notes. The trouble is, I love them all so much, it's going to be a bit difficult giving them away!


CHRISTMAS DIY: gift wrap + bags

Monday, 15 December 2014

Last week I posted about the Christmas shoot I styled for 91 Magazine and this week I wanted to share some extra little crafty details that will perk up your gift wrapping.

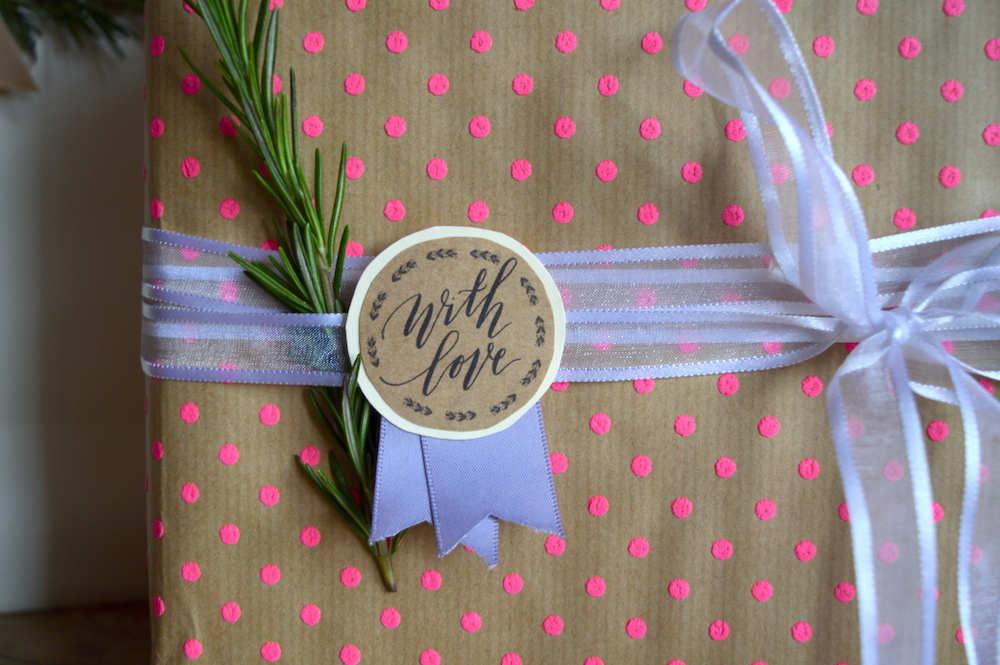
I'm a big fan of simple brown paper and ribbon (this polka dot update is from Paperchase) and so it's usually the little details that make it extra special - one year I illustrated ribbons and gift tags straight onto the paper and last year I tied them up with jute string and a sprig of rosemary.


With the leftovers I had of the Imogen Owen x Quill London printable for 91 Magazine, I decided to make some little ribbon badges to adorn this year's presents. I simply cut-out discs, glued them to another layer of paper for a contrasting trim, and then used double-sided tape to attach different ribbons to the back. I love the way they look so much, I ended up making a whole bunch more which I will probably never give away!

I also found a way to re-use gift bags, covering any logos or brand names with a strip of satin ribbon and a little disc. I think it looks really sweet and it's a good way to use the bags I always keep for just such occasions, but never use because they usually have writing on them.


CHRISTMAS DIY: clay ornaments

Wednesday, 10 December 2014


Last week I got my Christmas craft on and made these little hanging ornaments to give out instead of Christmas cards this year. I got the idea from the DIY mecca that is A Beautiful Mess and used a couple of their designs, along with my own.