MISMATCHED CHRISTMAS GIFT WRAPPING

Friday, 18 December 2015

Of course it's what's inside that counts, but I always like to make a special effort with the wrapping paper too. I usually go down the brown paper route - especially when there's a stash of beautiful velvet ribbons at hand (Tiger is the best. You can't go wrong with £1 a roll!)

This year, I picked out a few rolls of coloured wrapping paper as well - again, from Tiger. Although there are three different types of paper, the gold brings everything together and I think that harlequin turquoise makes for such a great contrast. Hooray for non-Christmas Christmassy colours!


These hand-painted gift tags were just about all the crafting I could muster this year. It was actually really relaxing to get my paper and paints out and spend an evening designing different baubles and despite the minimal effort, I actually think they turned out rather sweet! At the last minute, I also did a few red toadstools inspired by my favourite vintage decorations - they go perfectly with the acorn paper!


Luckily I have a small family so Christmas wrapping doesn't take too long. I like to make an evening of it - I had a glass of mulled wine and Graham Norton on in the background while I wrapped up my presents. This might be a dorky thing to suggest, but wouldn't it be fun to have a wrapping party! You could pool resources with friends, put on some Christmas music and get wrapping. Or, the easiest alternative, just go somewhere where they do it for you - last year I blogged about Kiehl's who offer hands down the best gift wrapping service.


2 WAYS WITH CAULIFLOWER CHEESE

Wednesday, 16 December 2015

Cauliflower cheese is one of my all-time favourite comfort foods. It's a very British dish - big chunks of cauliflower in a creamy sauce, topped with rich, melted cheese - and is often served as a side to a traditional roast dinner, but my family and I have always eaten it as the main event with a sprinkling of crunchy breadcrumbs.

For the past few years I have been using the BBC Good Food version; the roux sauce follows a super-easy all-in-one method that takes all the faff out of it. I usually half the base ingredients and stir through butter-browned onions and sometimes mustard.

To make four(ish) portions
1 large cauliflower
250ml milk
2tbsp plain flour
25g butter
1 onion, finely sliced

Pull apart the cauliflower florets and boil in water until fork-tender. Heat some butter in a pan and cook the onions on a low heat. Meanwhile, put the milk, butter and flour in a saucepan on a medium-heat and whisk continuously until the sauce comes to a near-boil and starts to thicken (about 5 minutes or so).

If you want to make a normal cauliflower cheese, put the cauliflower and onions in an ovenproof dish and stir through the sauce. Cover with grated cheddar and bake for about 20 minutes at 220C, or until the cheese has melted and turned golden brown.

Now you've got the basics, here are two new ways to eat it:


Cauliflower cheese on toast makes a quick supper into a proper hearty meal with one of your five-a-day. Follow the directions as above, pile onto a slice of toast, scatter liberally with cheese and place under the grill for about 5 minutes, or until the cheese starts to bubble and brown.


If you still want traditional cauliflower cheese, but with a twist, chipotle cauliflower cheese is awesome. Wahaca have added it as a side dish on their winter menu and after tasting it a few weeks ago I knew I had to recreate it. It turns out it's ridiculously easy as you can buy the restaurant's own range of sauces in most large supermarkets. Simply follow the directions for regular cauliflower cheese and then stir through a few tablespoons of smoky chipotle sauce. If you can't wait to eat it, you can pop it under the grill instead of baking to melt the cheese. Serve with a big green salad (if you're that way inclined!) and dig in.

CHRISTMAS CRAFTING

Monday, 14 December 2015

I was on such a crafting kick this time last year, but this year I'm not so into it. I've done quite a lot of my Christmas shopping (don't hate me!), but I still love to include a few handmade items, so I thought I would do a little round-up of some craft ideas you might have missed if you haven't been reading my blog for very long - sorry about the repeat for anyone who's stuck around a while ;)


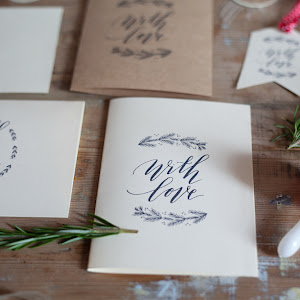
Last year I went on one of Quill London's calligraphy workshops with Imogen Owen and they kindly offered to create a free printable for 91 Magazine. This was one of my favourite features I put together for 91 Magazine because I loved the calligraphy class but it turns out I wasn't quite as talented as I thought I was going to be. Siobhan shot the lovely image above for the feature, which has templates to create a card and a gift tag.

I also got crafty with the printable myself, using the calligraphy motif to create little gift 'medals' and transform everyday paper bags into something a little bit more personal; the super-easy tutorial can be found here.


I actually created these little gift boxes for Valentine's day - and still have them piled up beside my bed because I couldn't bear to give them away! - and they would be perfect for gifting tiny treasures this Christmas too. Little children would love them (they could be gifts from Father Christmas' elves!) and they're perfect to wrapping up stocking fillers or little jewellery gifts.


And last but not least, clay ornaments. These are the easiest (not to mention cheapest!) DIY ever and result in a really thoughtful gift. I sent out plain brown paper Christmas cards with tiny personalised ornaments last year and they went down a treat. This year, I'm using the same tutorial to make larger discs as candle covers to stop my favourite candles getting dusty. On a side note, this DIY also informed my Christmas present from my parents; a new lens for my camera. Up until then, I had been using the kit lens it came with, but I borrowed my friend's lens to take these photos and knew I had to have one! It made a marked difference to my photos and has allowed me to take all of the food photos I'm not so proud of!

ALMOND, POLENTA & RUM PLUM CAKE

Friday, 11 December 2015

The sad reality of blogging about food and working full-time in the winter is that sometimes you're not 100% happy with a post. While I don't think these photos are bad per say, they came out so dark I had to play with the exposure so much, resulting in the cake looking much more orange than it actually is. Nobody did anything wrong; the recipe turned out beautifully but somewhere between taking the cake out of the oven and setting up, the light went and that was that.

If I had the luxury of doing this full-time there would be no issue: the cake would be saved for tomorrow and I would get my perfect pictures. But I have a job and this cake, made on a Sunday, would have had to wait to be sliced and eaten until the following weekend, which is a waste. Yes, I could make it again, but delicious as it is, I don't feel like eating the same cake again just yet! The thing is, I work hard on my blog. I sacrifice weekends, healthy eating, seeing friends to get it to look the way I want it to and of course it's paid off - I've been tagged in people's posts who've made my recipes and I'm working with some amazing brands - so as sad as I am about these pictures of a beautiful cake that I couldn't make look quite as beautiful as it actually was, it's fine because this blog is my passion and my hobby, I love it and the cake is darn delicious, so go make it, okay? (Rant over).


I used Jamie Oliver's polenta cake recipe with a few tasty additions and subtractions.

For the cake
200g butter at room temperature
200g demerara sugar
3 large free-range eggs
200g ground almonds
100g course polenta
Zest of an orange
1tsp baking powder

For the topping
6 plums, halved and stoned
1 stick cinnamon
5 cloves
50ml rum
2tsp demerara sugar
Handful toasted flaked almonds
Juice of an orange

Preheat the oven to 160C. Beat together the sugar and butter until creamy and then beat in add in the eggs one-by-one and stir to combine. In a separate bowl, combine the ground almonds, polenta, orange zest and baking powder. Pour the mixture into a tin lined with greaseproof paper.

In a pan, heat the rum with 1tsp sugar, the cinnamon stick and the cloves. Place the plums flesh side down in the pan and heat until bubbling and the rum has mostly disappeared (about 5 - 10 mins on a medium heat). Press into the top of the cake and sprinkle with the almonds.

Bake for 40 - 50 minutes, or until a skewer comes out clean from the centre. If the cake starts to brown too much, cover it with foil for the last 10 minutes. Remove from the oven and poke holes in the top using a fork or skewer. Mix together the orange juice and the remaining teaspoon of sugar and pour over the cake.


p.s. the lack of light in my kitchen also explains why most of my food photos are actually taken on a bed...I don't eat all my meals on cosy blankets, btw!

6 (RED) CHRISTMAS IDEAS TO STEAL

Wednesday, 9 December 2015

I read a lot of magazines, but Red is the only one I religiously save back issues of. In fact, I didn't realise it, but I've been reading it for about 4 years and it has slowly become my weekend morning ritual or my bedtime read when just one article is all I'm after. I know this is starting to sound like a bit of a gush-fest, but their Christmas issues are one of my favourite ways to get into the festive mood so I thought I would share 6 Christmas ideas to steal from the archives.


2013: Host A Mince Pie Night
I'm really bad at having friends over - I always feel like my flat isn't really set up for entertaining and there's too much washing up to do afterwards (a dishwasher for Christmas, please?). This year I still want to have friends over, but with less of the hassle, so I'm hosting a mince pie night! A few bowls of crisps, a plate of cheese and antipasti and lovely hot mince pies - I'm going the easy route with puff pastry and shop-bought mincemeat with little stars on top and a dusting of icing sugar.


2011: Fake A Wreath
I love the look of a wreath, but fresh ones can be expensive. I love this cluster of decorations - the big honeycomb bell adds texture and volume while silver faux foliage is a chic way to do tinsel - and think a few of these would look sweet dotted around the house. If we had a staircase, there would definitely be one of these hanging off the bottom of the banisters.


2011: Make A Ham
Okay, this isn't an idea per say but I am obsessed with ham and this marmalade-glazed one looks amazing. We have a friend moving in with us for a few months - when he lived with us before I introduced him to little cocktail sausages cooked in marmalade and mustard and he gave me a huge jar of marmalade, so now I know just what to do with it! Get a nice big one; everyone appreciates leftover ham.


2012: Christmas Doesn't Have To Be Red And Green
I loved this Italian-inspired spread from a few years ago. I love the cosiness of an English Christmas with open fires and lots of green foliage, but the image above shows that warmer climes can still be festive. You don't have to sacrifice your interiors style for traditional Christmas colours!


2014: You Can't Go Wrong With A Jamie Oliver Christmas
Jamie Oliver's team must test and test and test again all his recipes because they always seem to turn out just right. A few years ago, Jamie's Best Ever Christmas was on TV and that year my mum and I used his turkey method - butter and herbs under the skin - his crispy roast potato method and his sweet leek and turkey pie recipe and Christmas bombe for Boxing Day. I also use his turkey carving method and can vouch for it not just for Christmas turkey, but your average Sunday roast chicken too.


2015: No Room For A Tree?
If you have room for a trolley full of presents, you probably have room for a Christmas tree, but not everyone has one and I think this stack of presents looks very inviting indeed! My family like lots of little presents to open because we draw the whole process out, opening one each at a time and we can be at it for hours. This would also be a really cool idea for an advent calendar; I've seen lots of DIY advent calendar ideas pop up this year...imagine rummaging through this pile to find each day!

HUMBLE PIE: lemon cake w/ rose water + blackberries

Friday, 4 December 2015
If you've been reading my blog for a while you'll have seen this post already as I shared the recipe back when I auditioned for the show. It was actually the dish I brought to my first audition; I've always known it was special so I had no qualms repeating it when I got through. Not only is this lemon cake my dad's favourite, but I used to make it day in, day out for 3 years when I worked in a tearoom. Yes, I could make it with my eyes closed, but that doesn't make it any less special. I stuck to my guns and made something simple but perfect and it paid off; this is my winning recipe and Marco Pierre White himself said 'always keep it simple'.


Cake, cream and jelly are one of life's best combinations (basically trifle, sans custards) and this makes a really lovely, properly British pud that will definitely impress people with a bit of extra technique. It's deceptively easy to pull together and everything can be made in advance, so it's perfect for Sunday lunch or an afternoon tea party.

To make the lemon cake:
3 eggs (150g)
150g self-raising flour
150g softened butter
150g caster sugar

To make the lemon drizzle:

Zest and juice of 2 lemons
50 - 100g caster sugar

The formula for a simple sponge goes: equal quantities of eggs, flour, butter and sugar. Three medium eggs should weigh about 150g, but if they weigh more or less, adjust your other ingredients to match; for example, if your eggs weigh 170g, then use 170g each of self-raising flour, butter and sugar.


Pre-heat the oven to 180C. Mix together the butter and sugar until smooth, then beat the eggs and add to the mixing bowl along with the flour and the grated zest of one lemon. Beat together until you have a creamy batter. Be careful not to over beat, though, or you'll knock out all the air and be left with a dense sponge. If you have a couple of lumps, they are likely to be butter and should melt when cooked anyway.


To make these little individual cakes, I used empty baked bean tins (I saw the idea here ages ago) that I thoroughly cleaned and removed the paper from the outside. To be honest, I don't recommend it - I cut myself pretty badly twice. On the show, they gave me a set of fondant pudding moulds and these worked much better and I liked the shape better too. 


Fill the tins about halfway full and then bake in the oven for 10 - 20 minutes or until a skewer poked through the centre comes out clean. If you are using a loaf tin instead, the cake will need around 30 - 35 minutes.


While the cakes are still in the tin, mix together the juice of two lemons with the caster sugar. It really depends how sweet you want the cake; if you are serving it with something like ice cream, you might want the syrup to be a bit more tart. Poke holes in the top of the cake with a skewer,  making sure to go all the way through to the bottom, and pour over the syrup. 


For the rose water cream:
300ml whipping cream

A few drops of rose water

Rose water is a lovely fresh flavour, but be careful not to overdo it as things can get a little overpowering. For the cream, simply add a few drops of rose water and whisk until thick and fluffy. It's best to go slowly with the rose water - you can always add more but you won't be able to subdue the flavour unless you have some extra cream to dilute it. You can fold in some crushed blackberries for a little bit of colour if you like, but they might alter the texture a little bit as the juice is quite acidic.


For the jellied elderflower blackberries:
75ml elderflower cordial mixed with 325ml of water
1 sachet of gelatine

The sachet of gelatine that I used is intended to set 570ml of liquid, but to make the jellies stand on their own, you need to use less liquid than the packet suggests for a more sturdy consistency.

Pour a few tablespoons of boiling water into a glass bowl and add the gelatine to the bowl (always add the gelatine second, never pour boiling water straight onto it). Gently stir until the gelatine dissolves. If the gelatine clumps, place the bowl on top of a saucepan of simmering water, add some of the elderflower liquid and stir until the lumps disappear, but never allow the mixture to boil. Then add the warm, gelatine-infused liquid to the rest of your elderflower mixture.

To create mini jellies, fill an ice cube tray about half full with the mixture and place in the fridge to chill. After about half an hour, test the jelly with your finger and if it has set, or at least started to set, you can press a blackberry into it and then top up with more elderflower. You can also use this jelly in a mould or small bowl and it will set in the fridge in a few hours. To turn out the jellies, put half an inch of warm water in a baking tray and then place the ice cube tray in the pan for a few minutes so that the jelly softens slightly. Then using the the end of a teaspoon, gently push out the jellies and they should pop out in shape. Don't worry if some break - it just gives a more rustic finish ;)


The last round of the competition, when I went head to head with the other finalist, Carine, was really tough. Up until that point we were kind of on equal footing - you can find my Vietnamese beef recipe here - and our puddings both turned out well without any major disasters. It really was such a mind game in that final round, with the producers egging us on to criticise each other's desserts. It still hasn't quite sunk in that a Michelin-starred chef said that my cake was perfectly cooked; at that point, the producers were behind the camera telling us 'who was Marco talking about? Tell her you think yours was perfectly cooked!' In my heart I knew I'd nailed the sponge, but it would have been heart-wrenching to say mine was perfect and then not have won! 

In the end, neither of us eliminated ourselves. I think it was just too close and we both felt that the risk of eliminating yourself and then finding out that Marco Pierre White would have sent the other person home would have been so much worse than missing out on the cash you'd get for bowing out. I was also confident in my special little pudding and now, every time I eat lemon drizzle I will think of this amazing experience.

HUMBLE PIE: vietnamese bun bo xao

Bun bo xao** is a sort of stir fry/salad hybrid from Vietnam. I first had it at Pho (when I finally tried something other than their addictive pho soup noodles) and I was totally hooked by the fresh sweet, spicy, sour and salty flavours that are so common in South East Asia. It's usually served luke warm - the salad ingredients can be prepared in advance and then topped with seared beef - which makes it great for when you have friends and family over, as you can make nearly everything before hand, plus I think it looks quite impressive!


When I found out I had to come up with a beef dish to make on Humble Pie and I only had 2 days to think of something, test it and send a list of ingredients off to the producers, I panicked a bit; cooking meat isn't my strong point. And then I remembered how much I loved this dish and knew it perfectly fit the brief of beef with a twist. The only problem was, I'd made all of the components individually before, but never served them up together as the full bun bo xao. Anyway, I didn't have time to test it so I sent off my ingredients and quantities and hoped for the best when I tested the recipe the following week!

There are a lot of components to this dish, but it actually comes together pretty quickly and what I like about it is that you can pick and choose the bits you want to have. Yes, it's a bit of a show-stopper with everything all on one plate, but if you're pushed for time, the beef is SO DELICIOUS on its own with plain rice; the salad part goes perfectly with fresh king prawns; the spring rolls are enough of a faff in their own right - and are so amazing - that you could just make that part too. In honour of this modular dish, I've written up the recipe with all the different components separately, so if you fancied having a go at just one part, then it should be easy to follow. If you make everything in the quantities I've suggested, it's perfect for two people, so bear that in mind if you decide to leave some bits out.


For the steak
175g ribeye steak (or any cut with a good fat content)
2 sticks lemongrass
1 clove garlic
2tsp sugar
1tbsp fish sauce
1tbsp rice wine vinegar
Salt and pepper

Chop the lemongrass, grate the garlic and rub over the steak. Pour over the sugar, fish sauce, salt and vinegar, massage gently and leave for at least half an hour to marinade. Lemongrass is fairly easy to come by in larger supermarkets, but if you don't have any to hand then you can substitute it with a small piece of grated ginger.

Heat a griddle pan with a splash of olive oil and a small knob of butter until just foaming. Fry the steak for a minute on either side, or to your liking.


These spring rolls are a little out of the ordinary...they're actually a combination of fried spring rolls and fresh summer rolls (you can find my summer rolls recipe here). In Vietnam, fried spring rolls  come with a side of big lettuce leaves and plenty of herbs, which you're meant to wrap around the spring rolls. With this version, the crispy fried spring roll is wrapped in lettuce and then secured with another spring roll wrapper for an awesome fusion of textures and fresh flavours. They are a bit of a faff as you are essentially making two rounds of spring rolls but they are SO WORTH IT. If you've never made spring rolls before, it might be worth making these on their own one day to get the hang of it.

For the spring rolls
10 raw king prawns (fresh or frozen)
2 shallots
2 mushrooms
Half a small carrot
1 spring onion
1tsp sugar
Half a tbsp fish sauce

4 small spring roll wrappers/4 large spring roll wrappers
4 leaves round lettuce
Basil, mint and coriander

Put the first list of ingredients in a mini food processor and blend until smooth. I wasn't going to post the picture below as it looks a bit unappetising, but I thought I'd reassure you that that's what it's supposed to look like! Soak one of the small wrappers in hand-hot water for about 10 seconds and then place on a plate. Place a large spoonful of the mixture in a sausage shape in the bottom third of the wrapper and then fold the bottom up and sides in (like you would with a fajita), and roll over to secure - there are plenty of videos on Youtube if you get stuck. Repeat with the other small wrappers (and continue until your mixture is finished, if needs be). Heat an inch of sunflower oil in a small pan. Once it's hot - you can check it by dropping in a piece of coriander and see if it sizzles to the surface - gently place one of the spring rolls in, fry for a few minutes and then turn and fry for another minute or two. If you have space, you can fry two at a time but be careful as if they touch in the pan they will stick together like glue! Also be careful of your oil getting too hot, as it will make the wrapper come away from the filling (like in my picture...oops). Repeat until your small spring rolls are cooked.

Soak one of the large spring roll wrappers (if you just have one size, this step will still work - I've tried both ways before - but you won't be able to fit as many herbs in), place on a plate and then layer it with a lettuce leaf and a mixture of basil, mint and coriander. Place the crispy spring roll on top and roll as before.


For the salad
100g vermicelli rice noodles
1 carrot
Half a cucumber

3tbsp sugar
3tbsp rice wine vinegar (or 2 of white wine vinegar and 1 of rice wine)
1 lime
3 - 4tbsp fish sauce
2 cloves of garlic

Rehydrate the noodles according to the instructions on the packet - usually 5 - 10 minutes in boiling water - and then rinse thoroughly under cold water. Rinsing the noodles helps them not to stick together. Julienne the carrot and cucumber and mix in with the noodles. Add a splash of lime juice if they seem to be sticking already.

For the dressing, combine the sugar, rice wine vinegar, lime and grate in the garlic cloves. At this point, continue with caution! Not everyone likes fish sauce. Actually, a funny (IN RETROSPECT) story, my boyfriend hated this the first time I tested it, which had me really worried as the show was coming up very quickly, but it's mostly because he's not a fish sauce fan. If you use a good quality brand, 4tbsp should be about right, but cheaper brands can have a stronger flavour, so it's best to add and taste as you go. I like to mix half of the dressing into the noodles and then pour the rest of the dressing over later.


Garnishes are what give the dish a little something special. My style of cooking is generally pretty simple and then you can go in with some thoughtful additions to jazz it up a bit (like with the ratatouille I posted here). 
For the crispy shallots, finely slice shallots into thin rings. Heat half an inch of oil in small pan and, when hot, chuck in the shallots. If you have a slotted spoon, you can remove them all in one swoop when they start to brown. I was manically picking mine out one by one with chopsticks, so some of them got a little bit charred! They just add a bit of crunch to the salad, which I think really lifts it. 

For the quick-pickled cucumbers, slice the cucumber into whatever shapes you like. Pop in a jar with a few slices of chilli, a splash of vinegar, a few teaspoons of sugar and a pinch of salt. Add water if you need to so that all the cucumber is submerged. These aren't called 'quick-pickled' for nothing; if you make these at the very start, then they are lovely and sweet and sharp by the time everything else is ready, but they are also great overnight.

Roasted peanuts also make a tasty garnish, again for that crunch, and I like to go liberal with the herbs too. 

When you get to assembly, all the hard work is done. On the show, I was worried how it was going to look as I hadn't really planned out that part, but the more you throw on the better it looks - I'd rather have tempting food piled high and a bit messy any day than a sparse, but beautiful plate. Really, once you scatter the garnishes over everything, it really pulls the dish together. 

I feel like this post is a bit of a marathon, but I wanted to get the whole recipe out in one go. I hope it makes you feel like you want to cook it :) To read more about my Humble Pie experience, you can read my posts on what it was like to be on a TV show and a little bit about the audition process. Make sure you check out my winning pudding recipe too!

**Full disclosure: I've never been to Vietnam and I PRONOUNCED THE NAME OF THE DISH WRONG...ON TELEVISION! I should have googled how to say it beforehand, but for anyone wondering, it is pronounced like boon bo sao. Doh.

THE CHRISTMAS BOX

Tuesday, 1 December 2015

It's December! Christmas has been on my mind since October, but December 1st is the day I finally let myself get out my Christmas box. The Christmas box is where I hide away all my treasures, neatly packed up so they're easy to find and bring me joy every year when I get to unwrap everything and remember what's inside.


Ornaments
My family Christmas tree is a haphazard mix of ornaments collected from our childhood years; there are rusty metal ornaments, bizarre crafts and laminated drawings that go on the tree every year. To me, it makes the ritual of decorating the Christmas tree so much more magical to have ornaments that mean something, rather than a colour scheme of generic baubles and tinsel. For that reason, I've consciously collected a small but special array of (admittedly odd) Christmas decorations. When we first moved into our flat four years ago, our tree was a bit bare, but every year I treat myself to a few new decorations - the Paperchase caravan this year - and my mum usually picks up something weird for me from Petersham Nurseries. My other favourite places to buy decorations are Anthropologie and markets; the little glass mushrooms came from Sunbury Antiques Market.


Crafting
This year it seems like I haven't had enough time to think up any Christmas crafts, let alone get a start on making any. A few years ago I made pinecones rolled in glitter and last year I made clay ornaments; I'm glad I saved a few blank ones for any last-minute gifts this year.

Saved for Christmas
One of the things I'm fastidious about is making sure that I pack away everything Christmas-related before January 5th. Christmas pyjamas, tea towels and cushion covers go back in the box without fail, otherwise I know I would just end up using them throughout the year. Ditto candles; as well as making sure I only burn Christmas scents at the right time of year and my candles don't gather dust or get lost, they also make the whole box smell amazing, which is one of my favourite things when I open it up.